
TABLE OF CONTENTS
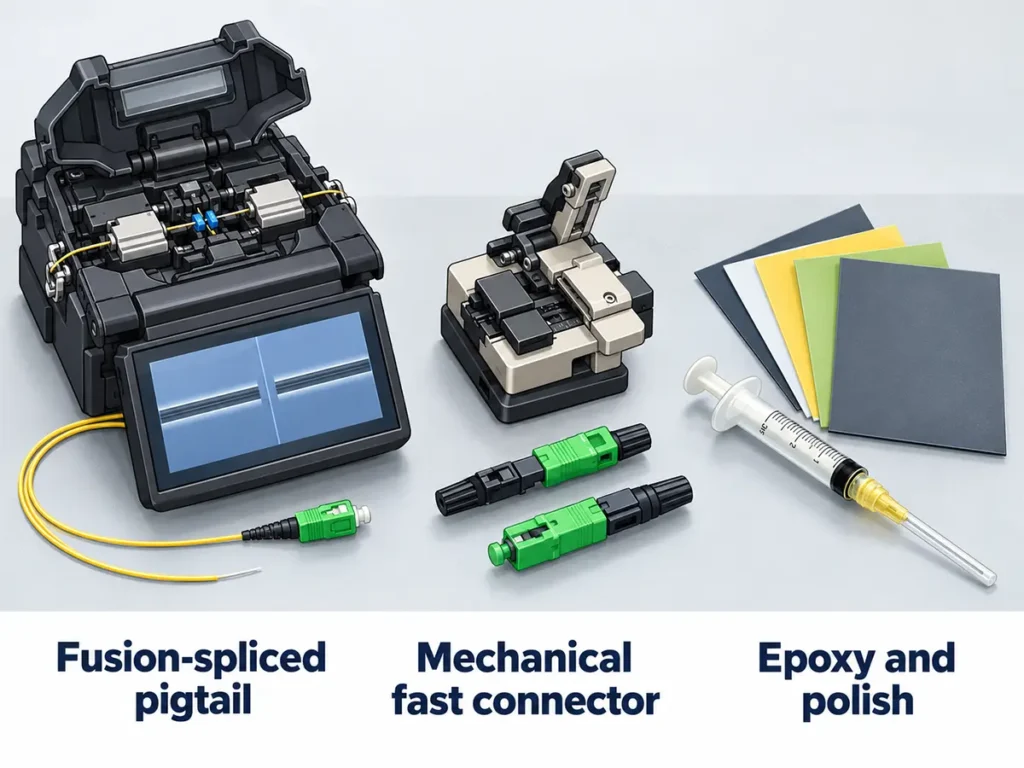
To terminate fiber optic cable is to finish each optical fiber with a connector so it can plug into equipment such as a transceiver, a patch panel or another cable. In the field there are three ways to do it: fusion splice a factory-made pigtail onto the fiber, install a mechanical fast connector, or glue a connector on with epoxy and polish the end face by hand. Most single-mode field terminations use a spliced pigtail or a splice-on connector, while multimode fiber is often terminated directly.[1]
Below, a table compares the three methods on loss, time and tools, followed by the steps and checkpoints for each and the tests that prove a termination is good. For FTTH drop cables with no splicer on site, mechanical fast connectors are the usual choice, and one fiber can be terminated in less than a minute;[2] ours are listed under fiber optic fast connectors.
What Does It Mean to Terminate Fiber Optic Cable?
In fiber optics, fibers are joined in two ways. A connector makes a temporary joint: it mates with another connector through an adapter, or plugs the fiber into network equipment such as an Ethernet switch. A splice makes a permanent joint between two fibers.[1] When installers talk about fiber optic cable termination, they usually mean the first: fitting a connector to the end of a glass fiber, either directly or by splicing on a short fiber that already has one.
Either way, the result is judged on the same two numbers. Insertion loss is the light loss where two connectors mate, and return loss, the inverse of reflectance, measures how much light reflects back toward the source. A clean, well-made termination keeps both within the link’s budget; a dirty or badly cleaved one can fail even when the cable itself is perfect. Both measurements are explained in what insertion loss and return loss mean.
Three Ways to Terminate Fiber and How to Choose
| Method | How it works | Typical loss | Time per fiber | Main tools | Best fit |
|---|---|---|---|---|---|
| Fusion-spliced pigtail | A factory-terminated pigtail is fusion spliced to the cable fiber | Factory connector typically under 0.3 dB,[1] plus 0.1–0.2 dB per fusion splice in loss budgets[3] | One fusion splice, plus tray work | Fusion splicer, precision cleaver | Single-mode, loose-tube and outside plant cable, many fibers at one point |
| Mechanical fast connector | A factory-polished fiber stub meets the field fiber in a built-in mechanical splice | Around 0.5 dB with a precision cleaver, more often near 0.75 dB with a simple cleaver[1] | Less than one minute[2] | Stripper, cleaver, assembly tool | FTTH drop cables, a few terminations at a time, no splicer on site |
| Epoxy and polish | The fiber is glued into the connector ferrule, cleaved and polished | Typically under 0.3 dB for factory-polished singlemode and multimode connectors; experienced installers can get comparable results on multimode in the field[1] | A couple of minutes per connector in batch work with a curing oven[4] | Adhesive, oven, polishing film, microscope | Multimode in the field; single-mode mostly in factories |
| Splice-on connector | A connector with a short factory pigtail is fusion spliced to the fiber | Connector loss plus the loss of the splice[2] | No longer than one fusion splice[2] | Fusion splicer, precision cleaver | Single-mode where there is no room for a splice tray |
The figures come from different conditions, as each cell notes: factory-polished connectors, loss-budget estimates, single terminations and batch work. Read them as the typical range for each method, not as the result of a side-by-side test.
How to choose a termination method:
- Single-mode cable and a fusion splicer available: splice pigtails, or use splice-on connectors. Loose-tube cables are usually terminated by splicing on pigtails.[4]
- FTTH drops, a few terminations per visit, no splicer: mechanical fast connectors.
- Multimode, indoors, many connectors: epoxy and polish. Experienced installers can get results comparable to factory terminations with this method.[1]
- Cable lengths known before installation: skip field termination and order pre-terminated cable.
Whatever the fiber optic termination method, TIA-568 allows a maximum of 0.75 dB per mated connector pair, according to the FOA’s summary of the 568-C edition.[5] That figure is a ceiling for the loss budget, not a quality target, and the parties to a project can agree on lower values.[5] Check which edition of the standard and which acceptance values the project specification names; a termination near 0.75 dB leaves little margin on a long link.

Before You Start: Tools, Clean Work and Safety
Every termination process starts with the same basic fiber optic termination tools, and each method adds its own:
| Method | Tools in addition to the basic kit |
|---|---|
| All methods (basic kit) | Cable jacket stripper, fiber stripper, isopropyl alcohol and lint-free wipes, cleaver, fiber scrap container, visual fault locator |
| Fusion-spliced pigtail | Fusion splicer, heat-shrink splice protectors, splice tray, factory pigtails |
| Mechanical fast connector | Fast connectors for the cable type, the connector maker’s assembly tool or cleave-length guide |
| Epoxy and polish | Connectors, adhesive and syringe, crimp tool, curing oven (for heat-cured epoxy), polishing puck, pad and film, inspection microscope |
The cleaver deserves the most attention. In fusion and mechanical splicing alike, the secret to a good joint is a good cleave on both fibers.[1] Keep its blade clean and replace or rotate it as the maker recommends. Clean the bare fiber after stripping to remove dirt and scraps of the stripped buffer before it goes into a connector or splicer.[4]
Work safely with bare fiber
- Never look into a fiber end or bring it near your eye; a broken fiber can emit light at an angle.[6]
- Put every fiber scrap into a container, then seal it and dispose of it properly.[6]
- Isopropyl alcohol is flammable; handle it carefully and keep it away from heat sources.[6]
- Before inspecting a connector with a microscope, check with a power meter that the fiber is dark: a microscope can focus the light from a live fiber into your eye.[6]
How to clean connector end faces before mating is covered in our fiber optic cleaning guide.
Method 1: Fusion Splice a Factory Pigtail
Splicing a pigtail gives every fiber a factory-polished connector and a low loss joint, which is why it is the usual choice for single-mode cable. The steps, in brief:
- Slide a heat shrink splice protector onto the fiber before anything else.
- Strip the cable and the fiber coating, then clean the bare fiber.
- Cleave the cable fiber and the pigtail fiber.
- Fusion splice them with the splicer’s electric arc; most fusion splicers then display an estimated loss for the splice.
- Shrink the protector over the splice and coil the fibers into the splice tray.
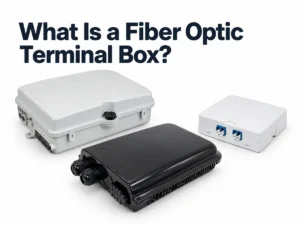
For loss budgets, figure 0.1–0.2 dB for each fusion splice.[3] The tray and its pigtails sit in a closure, a terminal box or an optical distribution frame; the box types are compared in what a fiber optic terminal box is, and pigtails in what a fiber pigtail is. Splicer setup, arc settings and fixing a bad splice are covered step by step in fiber optic splicing for beginners.

Method 2: Install a Mechanical Fast Connector
A mechanical fast connector, also called a field-installable or prepolished/splice connector, moves the hard part to the factory. A short stub fiber is glued into the ferrule and machine-polished, and the back of the connector holds a mechanical splice with index matching gel and a crimp that holds the field fiber.[2] One major manufacturer sums up the installation as “strip, clean, cleave, cam, and crimp”.[7]
The steps below follow a typical SC or LC fast connector on an FTTH drop or round cable. Check the connector installation instructions for strip and cleave lengths.
- Slide the boot and any cable clamp parts onto the cable.
- Strip the outer jacket to the length in the instructions (50–60 mm for YingFeng fast connectors), then strip the coating from the fiber.
- Clean the bare fiber with alcohol and a lint-free wipe.
- Cleave the fiber to the length the cleave guide gives. A precision cleaver gives more consistent loss than a simple one.[1]
- Push the fiber straight into the connector until it meets the stub. A slight bow in the fiber behind the connector shows that the two ends are touching.
- Hold the fiber in place and close the lock, then clamp the cable jacket.
- Fit the outer housing and the dust cap.
Checkpoint: connect a visual fault locator to the far end or the patch cord and watch the connector body. A visual fault locator can be used to verify and optimize mechanical splices and prepolished/splice connectors:[3] light lost at the internal splice shows through the connector, and keeping that light to a minimum gives the lowest-loss splice.[2] A bright glow can mean the fiber is not fully seated, a poor cleave or a dirty fiber end. If the connector’s instructions allow it to be reopened, re-seat the fiber and check again; otherwise, or if the glow stays, cut off the connector and re-terminate with a fresh cleave.
The two internal designs, with and without a pre-embedded stub, are compared in embedded vs non-embedded fast connectors.
Method 3: Epoxy and Polish a Connector
Most connectors, including virtually all factory-made terminations, are epoxy and polish types.[1] Factories use heat-cured epoxy and polishing machines; heat-cured epoxy is used less in the field because it needs an oven.[4] Adhesives for fiber connectors come in three general categories: epoxy, hot melt and anaerobic.[8] Each needs its own technique, and some epoxies cure overnight at room temperature instead of in an oven.[4] The steps below are the FOA’s general method for an epoxy connector; for curing and polishing, the connector and adhesive maker’s instructions take precedence.
- Slide the strain-relief boot over the cable, followed by the crimp bushing.[4]
- Strip the jacket and coating, then clean the fiber to remove dirt and buffer scraps.[4]
- Fill the connector with adhesive, insert the fiber, crimp the connector to the cable and cure the adhesive.
- Cleave the excess fiber sticking out of the ferrule.[4]
- Hand polish in three steps: an air polish with coarse film (about 12 micron grit), then a fine film (usually 3 micron), then a final film of about 0.3 to 1 micron. Always finish on a soft rubber pad.[4]
- Clean the connector again and inspect it in a microscope.[4]

Single-mode terminations need extreme care in assembly, especially in polishing, so they are usually done in a clean manufacturing facility with heat-cured epoxy and machine polishing.[1] In practice, field polishing is mostly a multimode job; single-mode links get factory-polished pigtails or patch cords. The difference between angled and flat end faces is explained in APC vs UPC.
Splice-On Connectors
Connectors with mechanical splices are usually called prepolished/splice connectors, and the ones joined by fusion are called splice-on connectors (SOCs).[2] A splice-on connector has a short factory pigtail behind the ferrule, which is fusion spliced to the field fiber, and the termination takes no longer than a fusion splice.[2] When testing, remember that the connection loss of this type includes the connector loss plus the loss of the splice that attaches it.[2] It suits single-mode jobs where a splicer is on site but there is no room for a splice tray.
When to Skip Field Termination
If cable lengths are known before installation, the fiber can be terminated and tested in a factory and arrive ready to plug in. Installers then pull cable and connect it, with no stripping, cleaving or polishing on site. The trade-off is planning: each length has to be measured in advance. With field termination, an installer cuts every cable to length on site; with pre-terminated cable, a run that turns out too short has to be reordered, and extra length has to be coiled and stored. Pre-terminated drops, multi-fiber trunks and plug-and-play FTTH systems are compared with field termination in pre-terminated fiber systems for FTTH.
Test and Troubleshoot Every Termination
Test each termination before the cable is closed up:
- Make sure the fiber is dark, then inspect the end face with a microscope, and clean it if needed. Visual inspection does not replace measuring attenuation and return loss.[9]
- Check continuity with a visual fault locator. These tracers inject visible light, which shows breaks and bad joints through buffered fiber and even single-fiber cable if the jacket is not opaque.[10]
- Measure end-to-end loss with an optical loss test set. Tier 1 testing covers insertion loss, length and polarity.[11] Compare the measured loss with the loss budget calculated for that link before testing: the fiber loss plus every connector pair and splice in it.[3] Under TIA-568 as summarized by the FOA, each mated connector pair may lose at most 0.75 dB and each fusion or mechanical splice at most 0.3 dB;[5] use those limits to build the budget, not to judge the link total.
- Add an OTDR trace where the project calls for it. An end-to-end loss test does not show the loss of each joint. An OTDR measures the loss and the reflectance of each connector and splice,[3] and Tier 2 OTDR testing complements the Tier 1 loss test rather than replacing it.[11] If the specification sets return loss values, measure them as it requires.
When a termination fails, the symptom usually points to the cause:
| Symptom | Likely cause | What to do |
|---|---|---|
| High loss on a new termination | Poor cleave or dirty fiber | Clean, re-cleave and redo the termination |
| Very poor return loss, or high loss at one connection | APC connector mated with a UPC connector | Use matching end faces at every adapter: APC to APC, UPC to UPC |
| Light glowing at a fast connector’s splice zone | Fiber not fully seated, poor cleave or dirty fiber end | Re-seat the fiber if the design allows; otherwise re-terminate with a fresh cleave |
| Loss changes when the cable is moved | Fiber bent too tightly behind the connector, or boot not fitted | Re-route the cable and refit the boot |
| High splice loss on the splicer | Dirty or chipped fiber ends | Clean, re-cleave and re-splice |
Fiber Termination Products from YingFeng
Fiber Optic Fast Connectors: SC/APC, SC/UPC and LC/APC pre-polished fast connectors for FTTH drop and round cables. View fast connectors
For field termination without a splicer, YingFeng makes SC/APC, SC/UPC and LC/APC fast connectors of the pre-polished, embedded type, for FTTH drop cables and round cables, and every fast connector is optically tested before shipment. For splicing, fiber pigtails are available alongside our fiber optic patch cords. For factory termination, we supply SC and LC connector kits and individual parts, and assembled connectors can be produced to your requirements on request. Samples are available. To get a quote, send us the cable type, connector and end face, and the quantity.
Frequently Asked Questions
What tools do you need to terminate fiber optic cable?
It depends on the method. Every method needs strippers, a cleaver, alcohol and wipes, and a visual fault locator. Fusion splicing adds a splicer and splice protectors; fast connectors need only the connector maker’s assembly tool; epoxy and polish adds adhesive, a curing oven for heat-cured epoxy, polishing film and a microscope. Acceptance testing needs an optical loss test set, plus a power meter to confirm a fiber is dark before inspection, and an OTDR where the project specifies one.
Is it hard to terminate fiber optic cable?
Mechanical fast connectors are the easiest to learn, but results still depend on a good cleave and clean fiber. Polishing single-mode connectors is difficult and is usually left to factories.[1] For emergency fixes to a damaged cable, see how to repair fiber optic cable.
How much loss is acceptable for a field termination?
TIA-568, as summarized by the FOA for the 568-C edition, allows up to 0.75 dB per mated connector pair, and a project can agree on lower values.[5] A fast connector installed with a precision cleaver typically comes in around 0.5 dB.[1] Check the measured total against the loss budget of the whole link.
How long does it take to terminate a fiber?
Can you terminate single-mode fiber with epoxy and polish in the field?
It can be done, but single-mode polishing needs extreme care, so most field single-mode terminations use a spliced pigtail or a splice-on connector instead.[1]
External references
- The Fiber Optic Association: The FOA Reference for Fiber Optics – Termination
- The Fiber Optic Association: The FOA Reference for Fiber Optics – Splice-On Connectors
- The Fiber Optic Association: The FOA Reference for Fiber Optics – Outside Plant Fiber Optic Testing
- The Fiber Optic Association: The FOA Reference for Fiber Optics – Hints for Terminating Fiber Optic Connectors
- The Fiber Optic Association: EIA/TIA 568 for Fiber Optics (summary of TIA-568-C)
- The Fiber Optic Association: The FOA Reference for Fiber Optics – Safety
- Corning: UniCam Frequently Asked Questions (product documentation)
- The Fiber Optic Association: The FOA Reference for Fiber Optics – Adhesive/Polish Connectors
- IEC 61300-3-35:2022, Fibre optic interconnecting devices and passive components – Part 3-35: Visual inspection of fibre optic connectors and fibre-stub transceivers: IEC Webstore
- The Fiber Optic Association: The FOA Reference for Fiber Optics – Visual Fault Location
- Fluke Networks: Tips for Tier 1 and Tier 2 fiber testing (Cabling Chronicles blog)