Fiber optic cables are more common in home networks than ever before, but they are also more delicate than most people expect. In everyday situations, damage often happens in simple ways—during renovation, when moving furniture, or even from pets chewing on exposed cables.
Unlike copper wires, fiber cables rely on transmitting light through a glass core, which means even a small bend, crack, or misalignment can completely interrupt the signal.
Once the cable is broken, many users start searching for quick solutions, especially questions like “how to fix fiber optic cable at home without tools.” The intention is understandable, but the answer requires a bit more context.
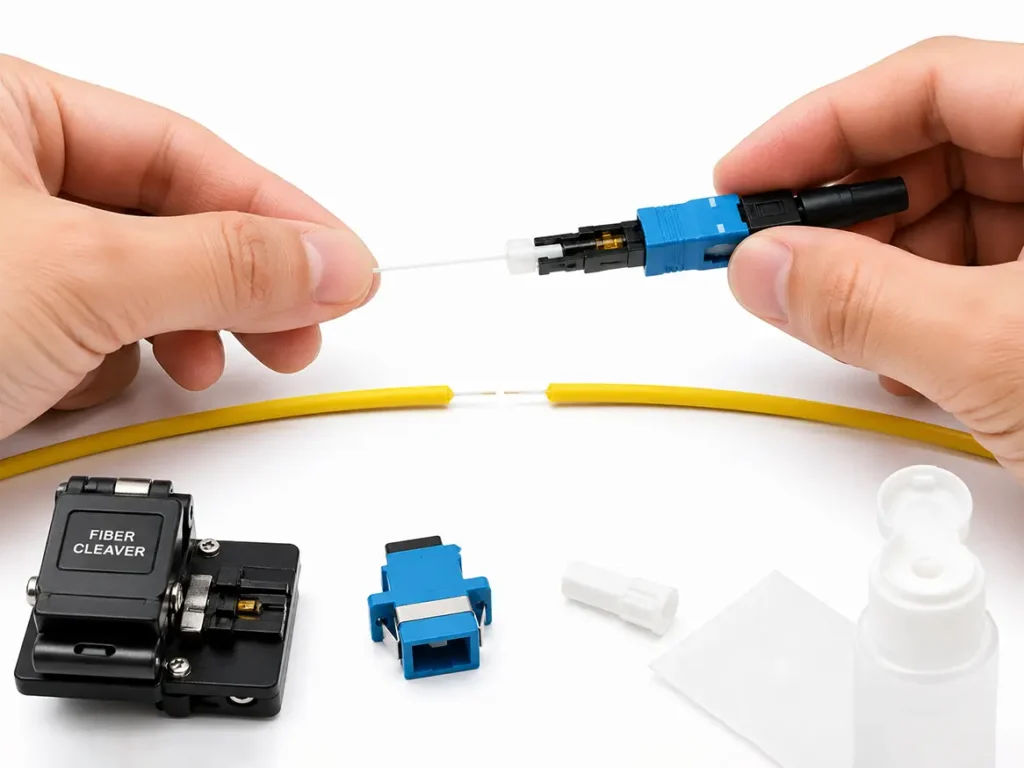
TABLE OF CONTENTS
Can You Repair a Fiber Optic Cable at Home?
The short answer is: Yes
But only to a limited extent. It’s important to understand that there’s a big difference between restoring a connection temporarily and performing a proper, long-term repair.
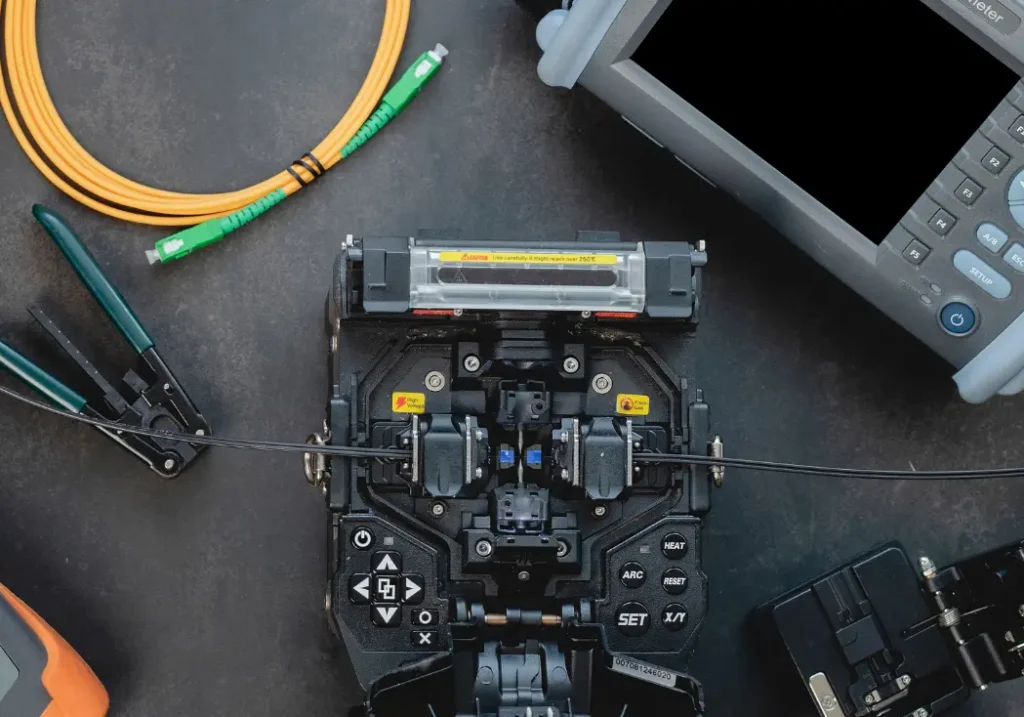
Professional fiber repair involves extremely precise alignment at a microscopic level. In real-world applications, technicians use specialized tools such as fusion splicing machines, fiber cleavers, and inspection microscopes. These tools are not only expensive, but also require training to operate correctly.
A fusion splicer, for example, can cost thousands of dollars and is designed to align and fuse fiber cores with minimal signal loss—something that simply isn’t realistic to achieve at home.
That said, there is still a practical workaround for emergency situations.
Two Ways to Repair a Broken Fiber Cable
In the fiber industry, there are two main repair methods. The first is fusion splicing, which is considered the permanent and most reliable solution. It offers extremely low signal loss and long-term stability, making it the standard choice for telecom infrastructure and data centers. However, due to the cost and skill involved, it’s not a method that home users can realistically adopt.
The second method is mechanical splicing, often done using fiber optic fast connectors. This approach is much more accessible and is commonly used for quick, on-site fixes. Instead of fusing the fibers, it relies on physically aligning them inside a pre-polished connector.
By installing a fast connector on each broken end and linking them with an adapter, you can restore the connection without needing expensive equipment. This method works well as a temporary solution, especially when internet access is urgently needed, but it does come with trade-offs. Compared to fusion splicing, it typically introduces higher insertion loss and is less stable over time, which is why it’s not recommended for critical environments like data centers.
What You Need for an Emergency Repair
If you decide to try a temporary fix, you’ll need a small set of basic tools. These are widely available as kits and can usually be delivered quickly through platforms like Amazon, often from local warehouses.
A typical kit includes:
- Fiber stripper
- Fiber cleaver
- Cleaning alcohol
- Fast connectors
- Fiber adapter
Most sellers also provide tutorial videos, which are highly recommended to watch before attempting any repair. If you’re sourcing in larger quantities or for project use, working directly with a manufacturer can be more cost-effective.
How to Use a Fast Connector (Simple Overview)
Using a fast connector is not complicated, but it does require careful handling and attention to detail. The process generally follows three stages.
Step 1: Preparation & Precision Cleaving
Start by sliding the boot onto the cable, then strip the outer jacket (about 50–60 mm). Use a fiber stripper to remove the coating and clean the bare fiber thoroughly with alcohol.
The most critical step here is using a fiber cleaver to create a clean, flat end face, as this directly affects the connection quality.
Step 2: Insertion & Contact Check
Insert the prepared fiber into the connector body until it reaches the internal pre-polished fiber stub.
At this point, a slight bend in the fiber (often called a macro-bend) helps confirm that the two fiber ends are in proper contact.
Step 3: Locking & Final Assembly
Secure the cable by closing the back cover and tightening the boot. Then lock the fiber in place using the connector’s internal mechanism and complete the assembly.
Once finished, the connection can function as a temporary restoration of your network.
If possible, follow a video guide during installation, as visual references make the process much easier and reduce mistakes.
Safety Tips When Handling Fiber
Working with fiber optic cables also requires some basic safety awareness. The fiber core is made of glass, and when cut, it can produce tiny shards that are difficult to see.
These fragments can easily get into your skin and are hard to remove, so it’s important to handle fibers carefully, keep your workspace clean, and dispose of scraps properly.
Repair or Replace: What’s the Better Choice?
In many cases, the decision between repairing and replacing comes down to practicality rather than technical possibility.
If the fiber cable you’re dealing with is relatively short—such as a standard home patch cord—the most straightforward solution is usually to replace it. Fiber cables typically have their specifications printed directly on the outer jacket, including information like fiber type (for example, G657A1), connector type, and sometimes length. By matching these parameters, you can quickly purchase a compatible replacement and restore your connection without the uncertainty of a repair.
Mechanical splicing using fiber optic fast connectors is not inherently unreliable. In fact, this method is widely used in FTTH deployments, and many telecom operators also rely on it for on-site installations.
However, the key difference lies in execution. For trained technicians with proper tools and experience, fast connectors can deliver stable and acceptable performance. But for most home users attempting a repair for the first time—often without testing equipment or precise handling skills—it is difficult to achieve an optimal result. Even a small imperfection in cleaving or alignment can lead to higher loss or unstable signal transmission.
As a result, the connection may appear to work at first but later cause intermittent issues such as fluctuating speed, signal drops, or reduced reliability. Without professional inspection tools, it’s also hard to verify whether the connection quality meets the required standard.
In these situations, many users eventually end up calling a technician to rework the connection. When you factor in the time, effort, and potential service cost, the total expense can sometimes exceed the price of simply replacing the cable from the beginning—especially for short-distance home connections.
Emergency repair still makes sense when immediate connectivity is critical and no replacement cable is available. But for long-term stability and peace of mind, replacing the cable—or having the repair done professionally—is usually the better approach.
Conclusion
Fiber optic cable repair at home is not entirely impossible, but it comes with clear limitations. While professional repair methods require specialized tools and experience, fast connectors offer a practical way to restore connectivity in emergency situations.
However, this should be seen as a temporary solution rather than a permanent fix. For most home users, replacing the cable is still the simplest, most reliable, and often the most cost-effective choice.